This is the long awaited not-so-top-secret go-to file for everything HAND PAINTED.
Let’s be honest, racing fashion can be an expensive hobby. And my wallet isn’t fat. So when it comes to outfits (and perfecting them) I rely on some handy DIY skills I’ve developed over time.
Paint is one of these important skills because the dilemma of colour will hinder your quest for perfection every time.
Firstly, if you manage to find the perfect hue, it will probably cost a fortune. Secondly, buying online? Those shoes are not going to be the same colour you saw on the web page. Guaranteed. Lucky for us, most things are easily hand painted.
You can hand paint an old pair of shoes/clutch/belt just to breathe new life into them, or buy a cheap pair of heels in the style you like and paint them to suit your outfit!
My First Experience Painting Shoes
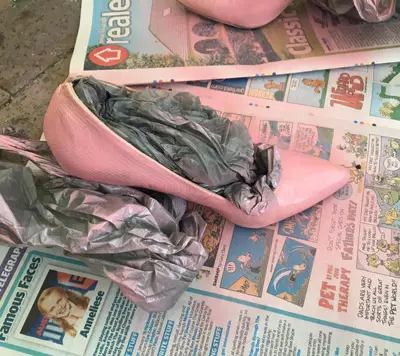
My first experience with shoes and paint was out of necessity. I couldn’t find the right pair of shoes for my Derby Day outfit. I found the right style. Wrong colour.
They were tan. And $179! So when thinking about paint I was reluctant to stuff them up.
I purchased some white acrylic paint from a paint store, a few paint brushes and some tape.
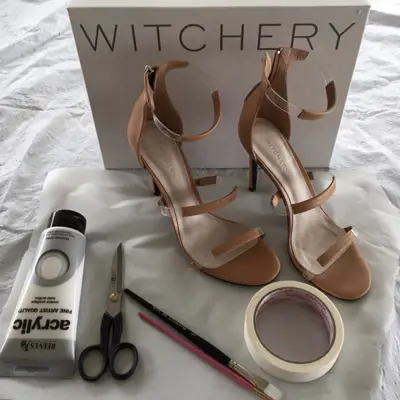
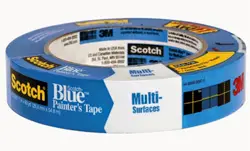
My first mistake was using the WRONG tape- do not use regular masking tape. Instead use blue painter’s tape. Just trust me on this one.
The first coat was an absolute disaster; a milky see-through yuk with every paint stroke visible. But for $179 I wasn’t giving up that easily.
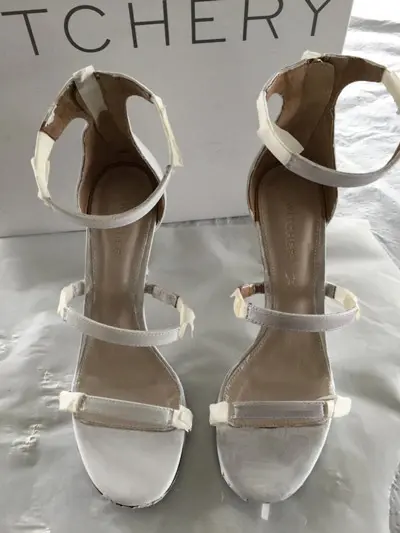
I painted again. This time paint strokes were still visible, but looking a little better.
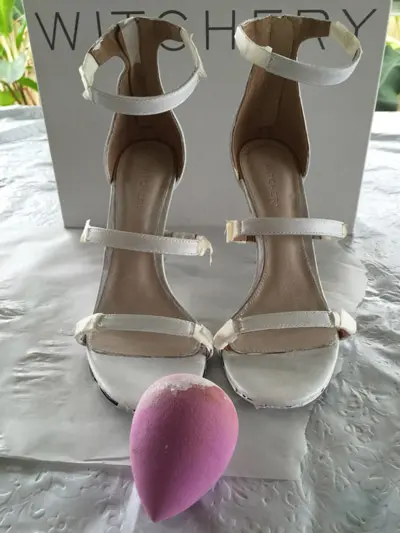
By the third coat, I’d smartened up. I ditched the brush and used my makeup sponge to dab on the paint lightly. Success!
The zipper at the back was also tan, but I wanted it black, so I taped up the entire shoe (minus the zip) in glad wrap and spray painted the zip.
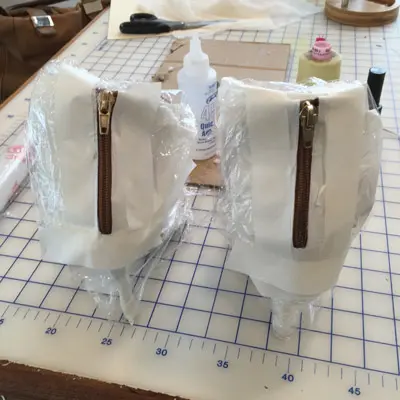
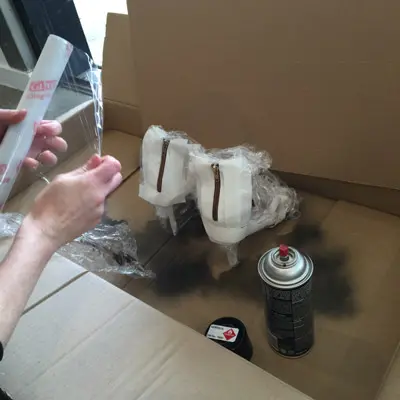
It was stiff, but it still went up and down. Good enough. In fact the paint has held so well I still wear them today. Yesterday actually! You can see how I made this outfit in my outfit design guide.

The Paint Files Case Studies
It’s often helpful to see real life examples of what others have done before you dive in.
In the following sections I am going to add case studies over time so that it becomes a handy reference for anyone planning to do some painting.
This is where you get the chance to share your successes (and failures if they can help us with what NOT to do). Please message me so I can add them to the files to help us all out next time we have a FOTF emergency ☺
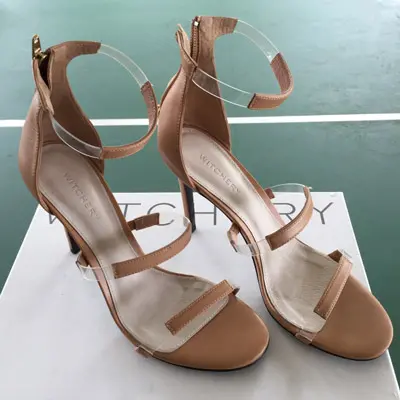
Hand Painted Shoes
Shoe Example #1 by Chrissy Spielmann
What: Red Witchery shoes sprayed with Design Master spray paint.
They were red and I painted them white – a couple of coats was enough and they turned out really well actually.
I found Design Master didn’t cover enough of a really old hat I had, so I used Bunnings touch up paint instead, which worked a treat. Except for the strong paint smell which hung around for quite a while!
Shoe Example #2 by Ana Pribylova
What: Bag and shoes painted with metallic spray paint from Bunnings because I couldn’t find anything to match.
Unfortunately, the shoes didn’t last long, the paint started peeling after the race day, but the bag was amazing. I still have it. It really depends on the surface you are painting as to if it will stick.
And some spray paints won’t dry properly, they stay tacky. You can also paint with PVA glue for a shiny surface- but the paint does lose its shine after a while.
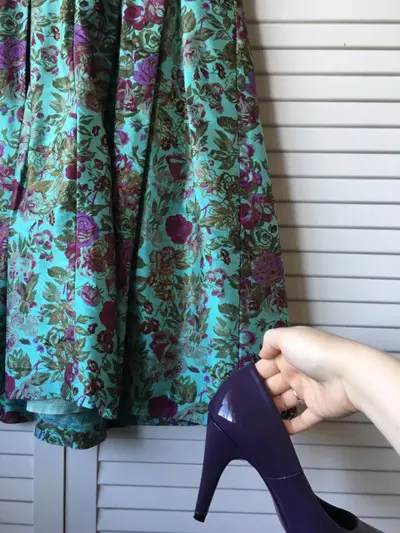
Shoe Example #3 by Tracy Press
What: Nude shoes sprayed purple with graffiti paint.
At first I got paint from Bristol paints- a multipurpose paint (as I had no idea what I was doing), sprayed the shoes and realized it was the wrong colour.
Bristol paints was shut. Luckily my daughter knew of a shop that sells graffiti paint.
The heels on these shoes are silver so I tried my best to cover them from over spray. But some got on there. I tried acetone, however, and it came off no worries.
I was feeling proud about my first go and it was time to wait and see what colour they would really turn out in daylight. They were perfect!
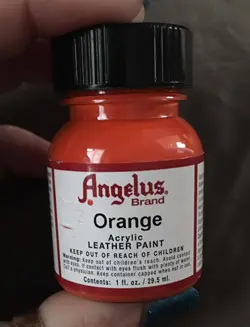
Shoe Example #4 by Paulene Curtis
I just painted this orange paint on with a fine paintbrush. I bought the paint on eBay (Australia).
I haven’t worn the shoes yet.
Shoe Example #5 by Meleisha Lill
What: Sprayed shoes purple with spray paint from Bunnings.
I ended up going with a spray from Bunnings because the guy suggested it.
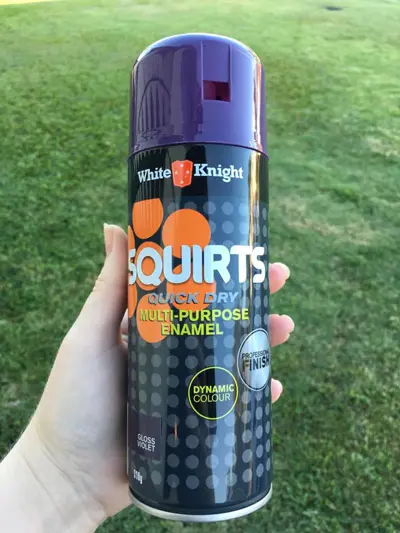
I taped up the bottom of the heels and sprayed two coats over the entire shoe. Super easy. I left about half an hour between the coats. Shoes were just an old pair of fake leather ones I had at home.

Hand Painted Clutches and Bags
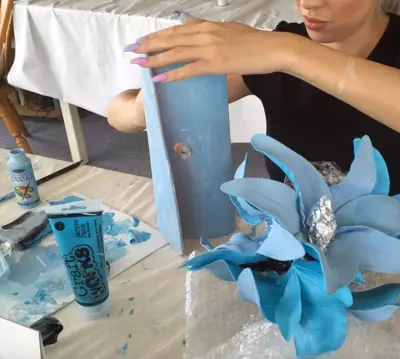
Clutch Example #1 by Milano Imai
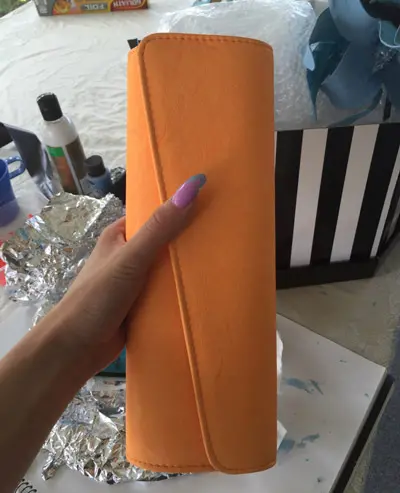
I started with a bright orange clutch and surprisingly this was much easier to paint than shoes.
I used standard blue acrylic paint from Spotlight- I mixed two blues together to get the right colour. I only needed two coats, a first light coat and then a second coat using a soft bristle paint brush.
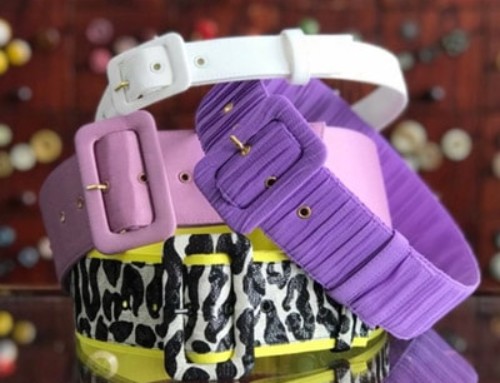
Hand Painted Belts
Belt Example #1 by [place holder]
[Placeholder – who has painted a belt before? Email your pic and some details to milano@milanoimai.com]
Hand Painted Millinery
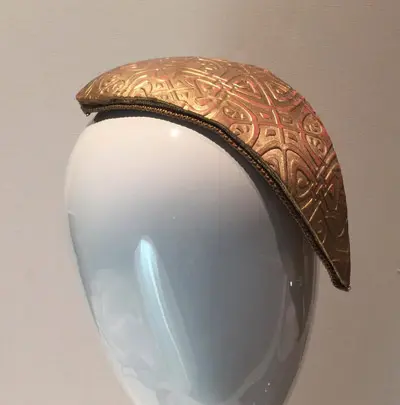
Millinery Example #1 by Chantelle Westlake
I often change the colours of pieces I use in my millinery and I have also changed colours of shoes to coordinate with my Latin American dance costumes.
For both, I use a product called Design Master. It’s a spray and comes in a lot of colours including metallics, producing great results.
A lot of the gold pieces in my current millinery collection have been sprayed using this. The downside is it is toxic and you need to wear appropriate respiratory gear, but the upside is, it is produces excellent results and is odourless.
The flower on this hat, was orange before I sprayed it.
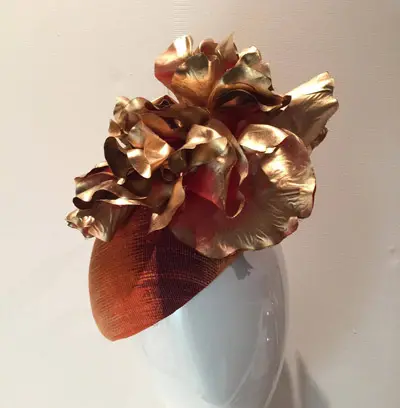
This piece has been sprayed twice, first with an apricot and then gold. It was white leather underneath.
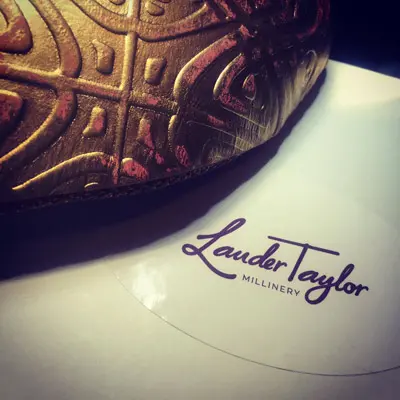
The reason for the two colour spray, was to give it a distressed look across the embossed leather and to give a lift to the gold.
Millinery Example #2 by Milano Imai
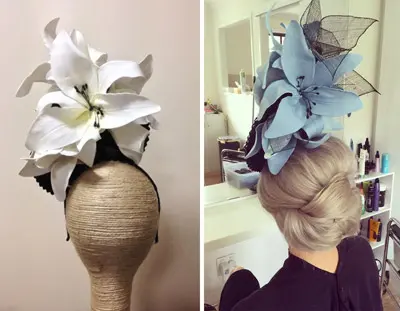
I painted a foam flower on my millinery. This was quite tricky as the first few coats sunk into the foam and looked very light and streaky.
I think I did about 5 coats of acrylic paint letting them dry in between, leaving the flowers quite stiff, but I liked this look. You can see clips of me painting this hat in my Magic Millions outfit video.
Millinery Example #3 by Michelle Robinson
I have used the ‘pebeo’ brand fabric paints. They’re quite thick, so don’t run when they’re used undiluted. If I want the colour a bit more washed out, I wet the fabric first. Or I add some water to the paint.
I use them mainly to hand paint lace etc. Once you are happy with the design, you let the paint dry for a few hours. Or blast it with the hair drier to stop the colour running. Then heat set it for 5 minutes with an iron. It can even be cold machine washed.
Hand Painted Clothing
Clothing Example #1 by Athena Lin
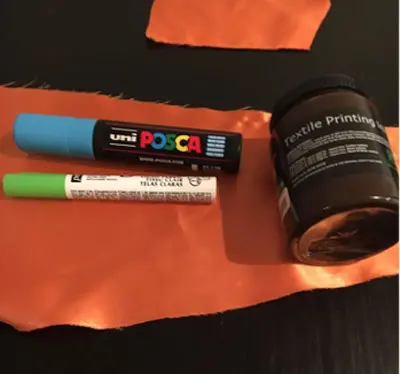
I painted my first Melbourne Cup outfit. I used the Posca fabric paint, but the colour tends to fade easily. I recommend Seta Skrib, which is ideal for fabric. Or you can use textile Printing Ink, which a lot of people use for silk screen printing.
No matter which one you use, after painting, I suggest allowing it to air dry for two hours, then iron it for between 5 and 10 minutes, low heat, no steam, with baking paper on the top.
If you want to use the fabric paint on something not of a flat surface, I suggest using a hairdryer. Remember, the heat will make the colour stay permanently on the fabric, so you have to be sure.
Fail Files – Examples of What Not to Do
Blooper Example #1 by Cobie Sheehan

I jumped on the faux Louboutin trend to jazz up a pair of black pumps to go with a red outfit.
I painted the soles red and was pretty impressed with the finished outcome… until I realized I’d used a water-based craft paint, which ran everywhere as soon as I walked in wet grass.
Moral of the story, make sure you do your research and use appropriate paint!
Now it’s your turn! Have fun painting and remember to send me a pic so I can add it to the paint files :)
Leave a Comment...
Hand Painted Millinery
Millinery Example #1 by Chantelle Westlake
I often change the colours of pieces I use in my millinery and I have also changed colours of shoes to coordinate with my Latin American dance costumes.
For both, I use a product called Design Master. It’s a spray and comes in a lot of colours including metallics, producing great results.
A lot of the gold pieces in my current millinery collection have been sprayed using this. The downside is it is toxic and you need to wear appropriate respiratory gear, but the upside is, it is produces excellent results and is odourless.
The flower on this hat, was orange before I sprayed it.
This piece has been sprayed twice, first with an apricot and then gold. It was white leather underneath.
The reason for the two colour spray, was to give it a distressed look across the embossed leather and to give a lift to the gold.
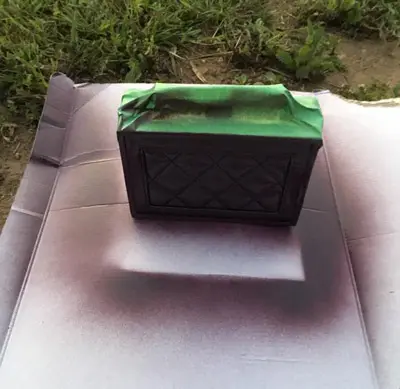
Millinery Example #2 by Milano Imai
I painted a foam flower on my millinery. This was quite tricky as the first few coats sunk into the foam and looked very light and streaky.
I think I did about 5 coats of acrylic paint letting them dry in between, leaving the flowers quite stiff, but I liked this look. You can see clips of me painting this hat in my Magic Millions outfit video.
Millinery Example #3 by Michelle Robinson
I have used the ‘pebeo’ brand fabric paints. They’re quite thick, so don’t run when they’re used undiluted. If I want the colour a bit more washed out, I wet the fabric first. Or I add some water to the paint.
I use them mainly to hand paint lace etc. Once you are happy with the design, you let the paint dry for a few hours. Or blast it with the hair drier to stop the colour running. Then heat set it for 5 minutes with an iron. It can even be cold machine washed.
Hand Painted Clothing
Clothing Example #1 by Athena Lin
I painted my first Melbourne Cup outfit. I used the Posca fabric paint, but the colour tends to fade easily. I recommend Seta Skrib, which is ideal for fabric. Or you can use textile Printing Ink, which a lot of people use for silk screen printing.
No matter which one you use, after painting, I suggest allowing it to air dry for two hours, then iron it for between 5 and 10 minutes, low heat, no steam, with baking paper on the top.
If you want to use the fabric paint on something not of a flat surface, I suggest using a hairdryer. Remember, the heat will make the colour stay permanently on the fabric, so you have to be sure.
Fail Files – Examples of What Not to Do
Blooper Example #1 by Cobie Sheehan
I jumped on the faux Louboutin trend to jazz up a pair of black pumps to go with a red outfit.
I painted the soles red and was pretty impressed with the finished outcome… until I realized I’d used a water-based craft paint, which ran everywhere as soon as I walked in wet grass.
Moral of the story, make sure you do your research and use appropriate paint!
Now it’s your turn! Have fun painting and remember to send me a pic so I can add it to the paint files :)