I have admired the art of millinery for many years and always longed to be able to create beautiful headwear. It has always been a mystery to me…. the way a hat could sit up on a head a particular way, or how trims appeared to be floating. And how did she get that feather to look like a bouquet of flowers?
Many hours were spent googling different techniques, but being a very visual person, I still found it difficult to learn. My skill set was limited to curling quills and painting flowers.
Enter, Ian Bennett.
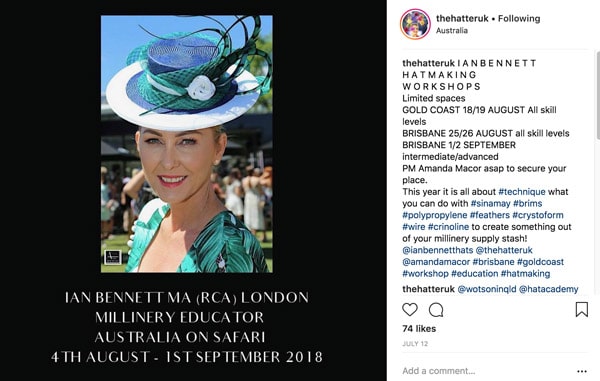
Image credit: @thehatteruk
Most of the millinery workshops advertised on Instagram, from milliners I follow and admire, were in Melbourne. I live in Queensland.
So, when the Ian Bennett workshop came up- with a class held on the Gold Coast, I immediately jumped at the opportunity.
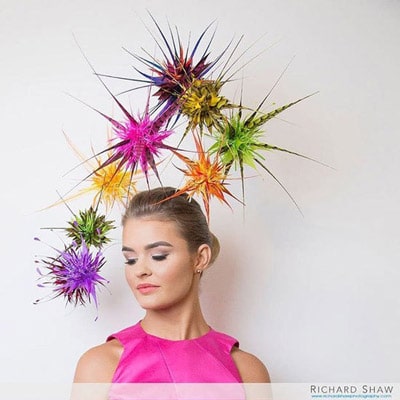
Image credit: Richard Shaw photo of Ian Bennett’s Fireworks hat
Ian is a world-renowned milliner from the UK, who has made hats for the Queen, Madonna and many other celebrities. He was the winner of the 2016 Myer Millinery Award with his stunning firework inspired creation.
Ian was out from the UK hosting a number of workshops around Australia, ranging from beginner to advanced classes.
Workshop vs Online Tutorial
There are many millinery courses offered online, which is a good option for anyone without access to a school. You can study at your own pace and can refer back to a video tutorial at any time. Video tutorials are great as you can pick and choose specific skills you wish to learn.
On the other hand, studying from a video means you can’t stop and ask questions if there is an area you are unsure of. The learning process can be slow, and it can be difficult when you can’t view the process from all angles. It’s easy to miss minor, but important, details that get lost during filming.
Personally, I think attending a workshop in person provides far more benefits than watching it all online. Being able to watch different techniques up close and ask questions to clarify the process is a great advantage. Most likely there will be other people in the class and their questions may be something you hadn’t thought of before, providing you with more information.
Being so close to the craft, you get to see things from all angles and having a teacher in front of you means you can be helped with anything you are having trouble with. And most importantly, during a workshop you get to be hands-on, and, in my opinion, the best way to learn is by doing.
What to Expect at a Millinery Workshop
Until now, my millinery skills have been quite basic. Even though I am a creative person and have revamped many hats, my actual skill set was very limited.
Ian Bennett’s workshop was a beginner’s course, to learn trims and techniques and was held over two days, from 10am to 4pm each day.
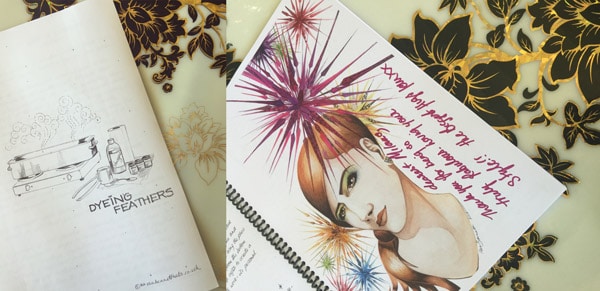
Day 1 – Dyeing Feathers and Blocking a Base
We were provided with study notes to write on, as well as the option of purchasing Ian’s (personally signed) book. I had already ordered mine months earlier and was ecstatic to receive it on the day!!
We were given a list of what we needed to bring to the class. For those attendees, such as myself, who had no millinery supplies, everything we needed was available for purchase.
All the materials I needed for the two days cost me around $70 and included a variety of feathers, crystoform, sinamay, wire, glue, etc.
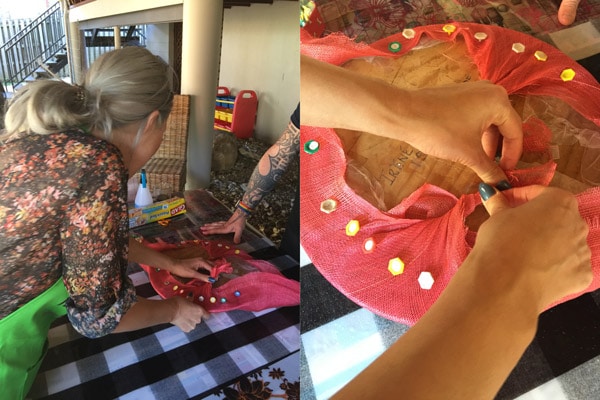
The workshop was very hands on. Ian would demonstrate and explain the techniques he was showing us, then we all had a turn ourselves, asking questions along the way.
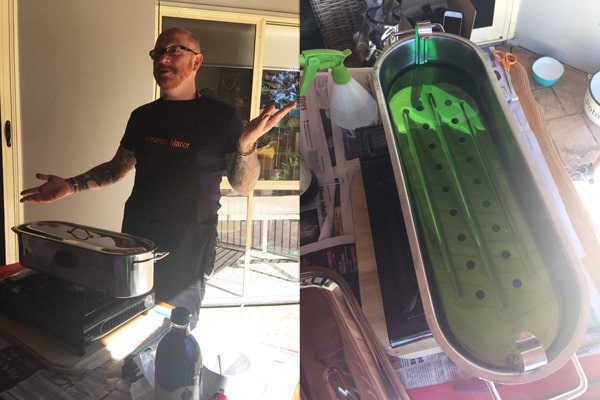
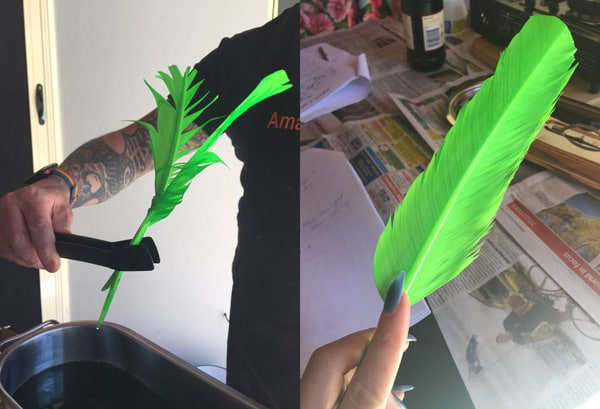
Here, Ian demonstrates the dyeing process, as well as how to prepare feathers. Would you believe that each feather has to be individually dried by hand!! No blow dryers allowed, just a whole lot of rubbing and shaking!
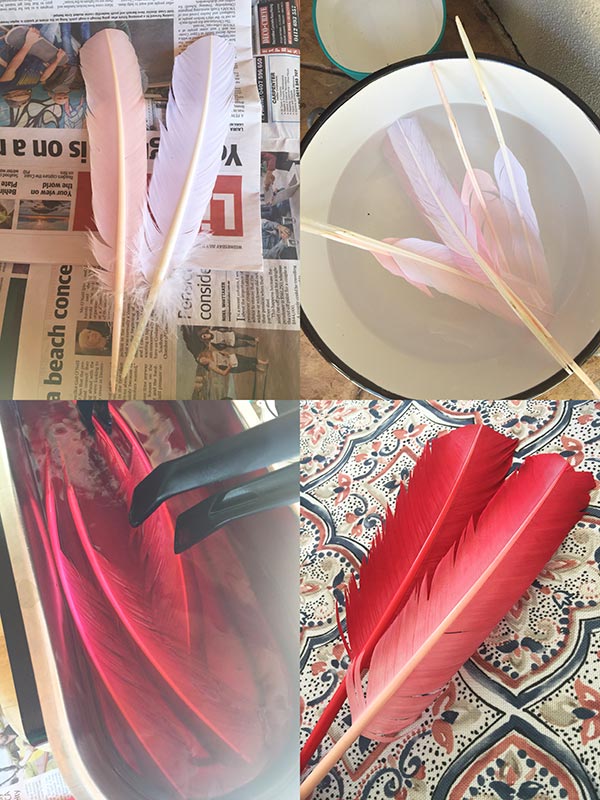

We dyed one feather a block colour and another to create an ombre effect. Learning this technique really made me (well even more so) appreciate all the hard work milliners do as (sometimes) every feather used in a hat is prepared, dyed, dried, cut and then arranged by the milliner. Ian says sometimes a whole day can be allocated to just dying feathers!!
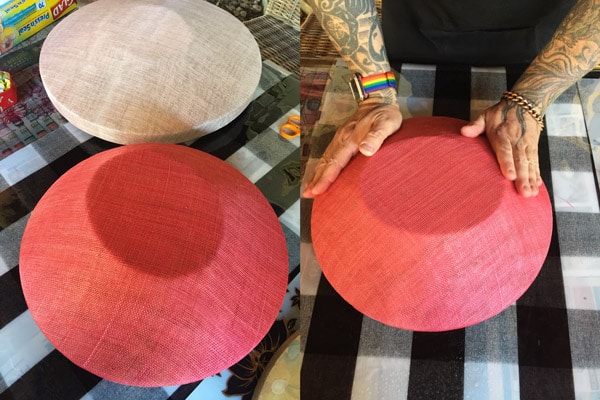
The next technique Ian showed us was how to block a base from sinamay. He made it look so easy and explained it very clearly. We each got to have a turn of blocking a base, starting from the process of dyeing the sinamay, stiffening it, laying it and cutting it.
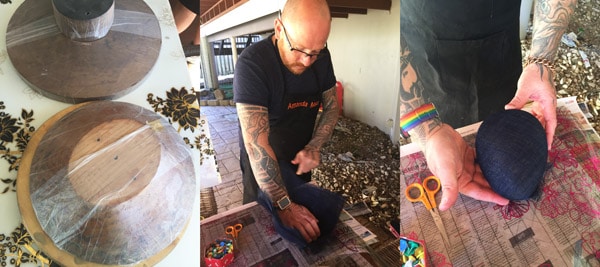
We left our hats on blocks to dry over night as it was already time to go home. Time flies when you’re having fun!!
Day 2 – Wiring a Base, Crystoform Flowers and Feather Flowers
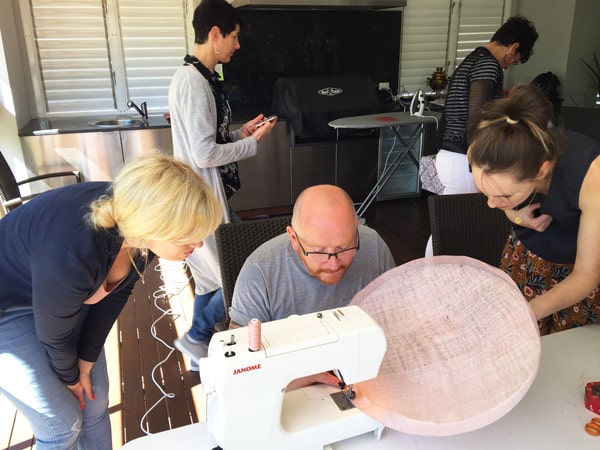
The second day of the workshop we got straight into it, as there was so much to do in just one day. Ian quickly went over the process of getting a hat off a block and how to wire it. It’s incredible watching these hats come to life from a sheet of flat sinamay!
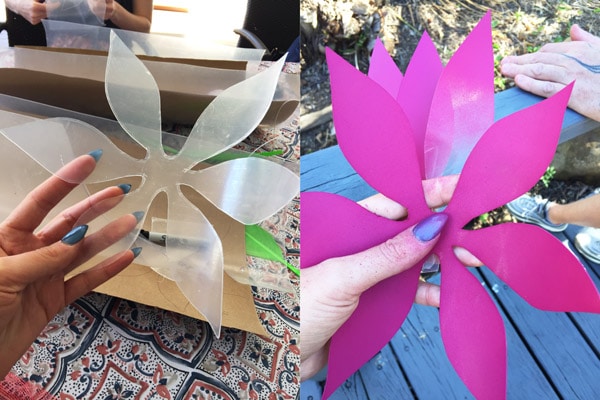
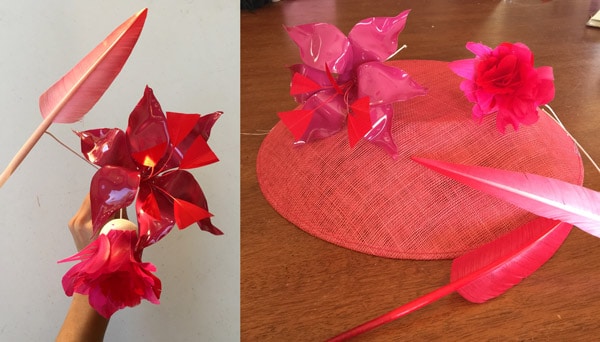
With our hats made, we moved onto another skill I had been DYING to learn; Crystoform flowers.
I saw these clear 3D flowers pop up a lot last year and thought they had been cleverly made out of plastic coke bottles. In fact, they are made from a sheet of clear plastic called crystoform. We made patterns to create a lilly flower and sprayed them in an array of colours.
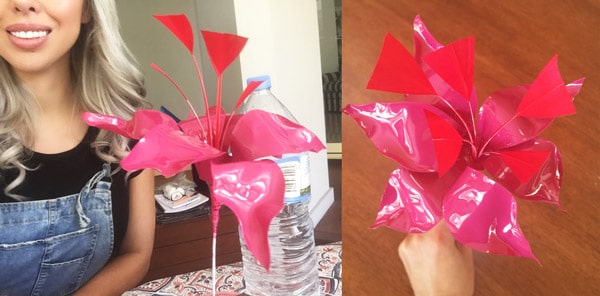
This course made a substantial emphasis on safety, which was interesting because I had no idea spray paint could be so dangerous to your health! Thanks to Safety Officer Ian, I am now on the hunt for a spray mask to wear, so I don’t inhale toxic paint fumes that can evaporate my brain fluid!
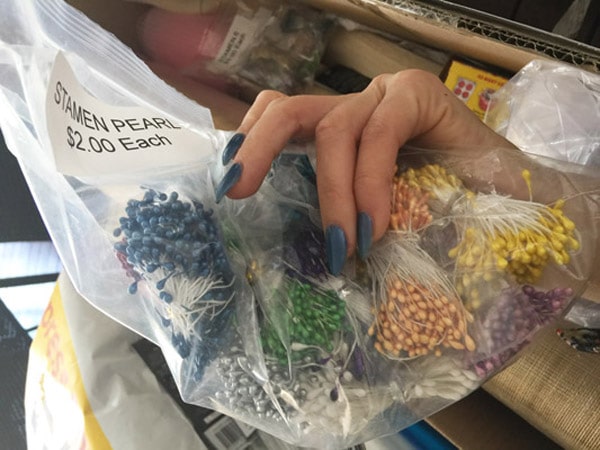
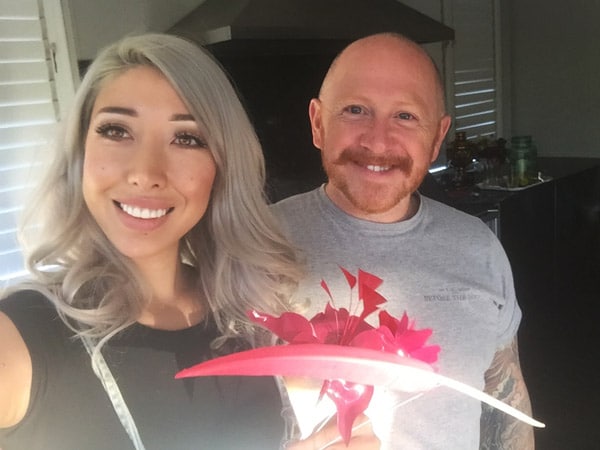
Just look at this pretty flower I made, complete with feather stamens! – also another skill we learnt.
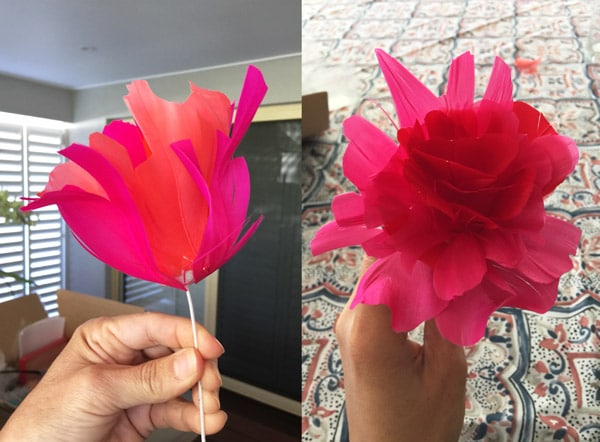
The last skill of the day, and probably my favourite, was learning to make feather flowers!
These beauties are made from individually cut feathers, hand shaped, then arranged into big flowers that look incredible on hats! I can’t wait to add some to my existing hats!
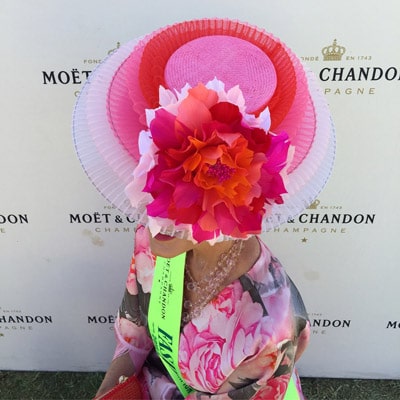
Amanda wears her own hat creation, but with an added Ian Bennett flower rose.
I was so sad when the class came to an end, but also excited to go home and practice all the new skills I had learnt. The information and knowledge Ian shared was priceless, something I will remember forever, and I am very grateful for being so generous with his teachings.
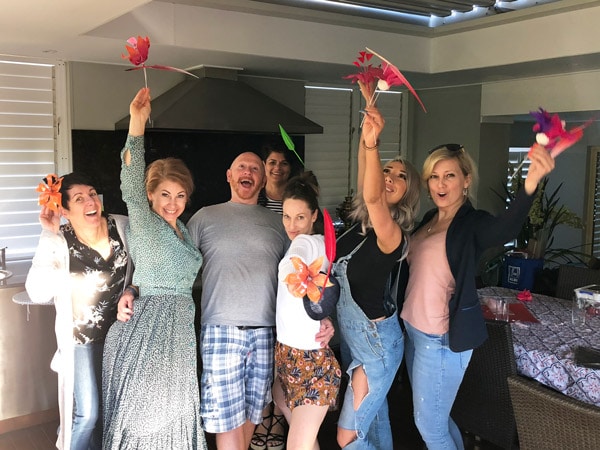
Everyone in the class had a ball, I think every second word out of Lindsay and my mouth was ‘AMAZING’.
My pride and joy from my two-day workshop! <3
After the workshop, I practised making some more feather flowers at home and even did a small collaboration with Huxley School of Makeup’s students.
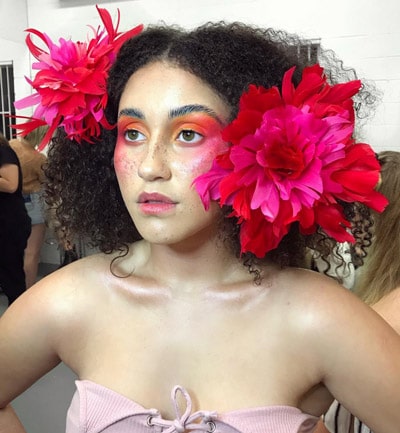
Image credit: @huxleyschoolofmakeup @_beautyxmel
Have you attended a millinery workshop? Which one did you attend and what did you love about it? Share in the comments below…